API Key Authentication Method
The authentication method below is outdated and will become obsolete in the near future. We recommend all of our clients to update their systems to incorporate HMAC authentication before the end of the grace period. To facilitate a smooth transition, we are providing a 6-month period where you will still be able to use the old authentication method.
If a client uses REST API, he cannot use the API key in the format that we have sent it – decoded. This point represents the problem’s core.
What do you need to do?
1. Encode
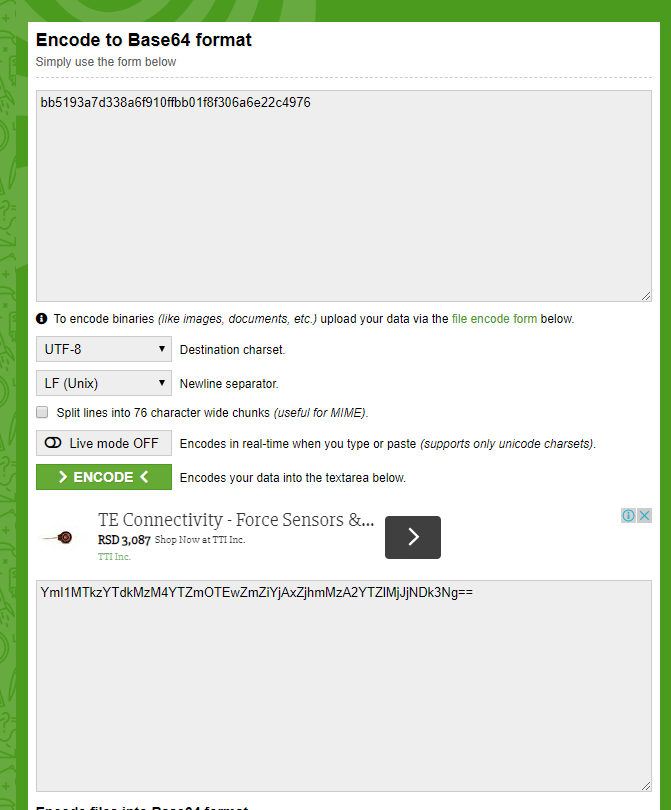
The API key needs to be encoded first. For that purpose, you can use the following link: – https://www.base64encode.org/. Here you need to paste your API key (usually provided by the account manager), then to click ENCODE, and finally to copy the encoded API key.
The example of this process is shown in the screenshot below.

2. Swagger
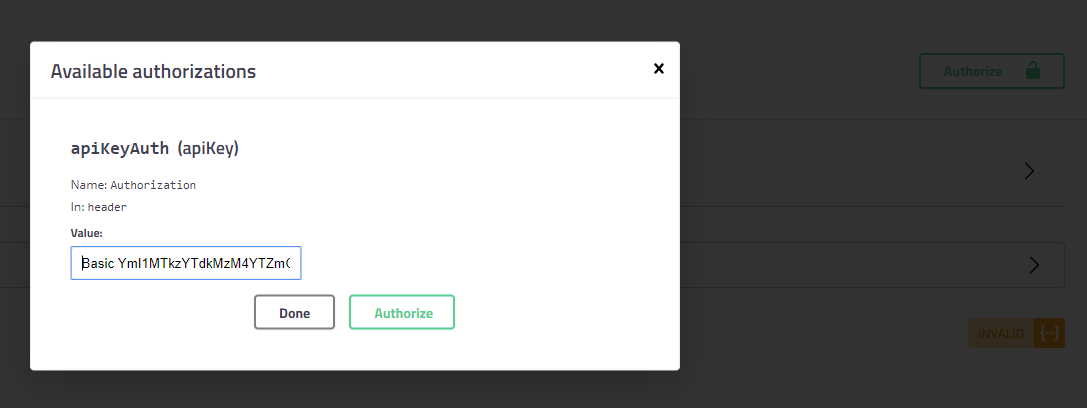
Once encoded, you need to copy the key into swagger – https://api.price2spy.com/rest/swagger-ui.html – the test tool which is also available on the documentation link.
However, there is also another mid-step that is required – it is not enough to just copy the API key. You need to add Basic in front of the encoded API key.
So, it should look like this: Basic YmI1MTkzYTdkMzM4YTZmOTEwZmZiYjAxZjhmMzA2YTZlMjJjNDk3Ng== and then click Authorize (Screenshot 2).

There is an explanation in the API documentation, too. Please see it below:
REST Authentication is performed by adding Authorization header to your REST
API requests. The content of the header is *Basic<Base64Encoded_API_KEY>*
Example
Authorization = Basic YmI1MTkzYTdkMzM4YTZmOTEwZmZiYjAxZjhmMzA2YTZlMjJjNDk3Ng==
Hopefully, now you have a bit clearer picture of how the process of REST API authorization works!
Of course, for any additional questions that you might have, please feel free to contact us.
