Google Analytics 4 Integration - a step-by-step guide
If you need more data than Price2Spy gathers for you by default, you have an option of integrating your Google Analytics 4 and Price2Spy accounts. This will enable you to manage and filter more data and in turn make better pricing decisions.
Below find the steps you need to take to perform the integration.
Please note, this feature is currently in the BETA testing phase and as such is free to use. We’d appreciate it if you would use it and let us know what we can work on to better suit your needs. Once released, this feature will become paid.
1. Initialize connection
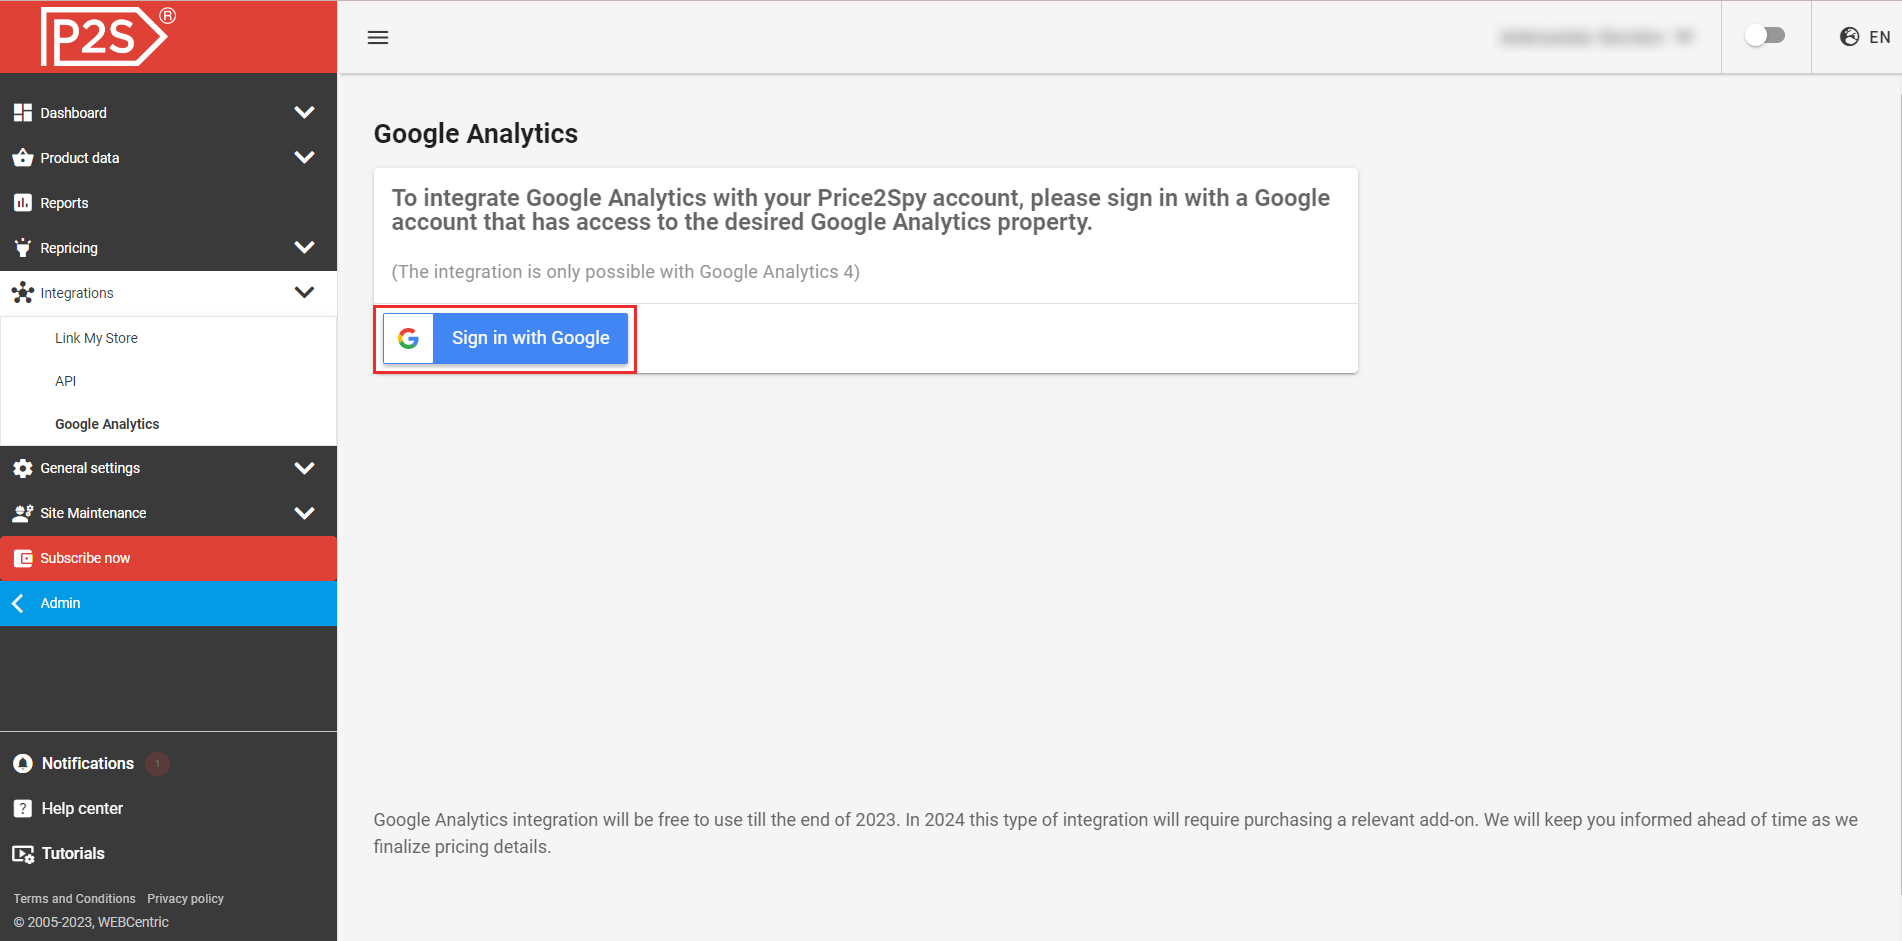
- Log in to your Price2Spy account
- Click on the "Sign in with Google" button
- Grant permission to Price2Spy to read the Google Analytics data
Important: Only a Google account that has access to an existing Google Analytics 4 property can be used in order to retrieve the data in the following steps.
2. Setting up parameters and metrics
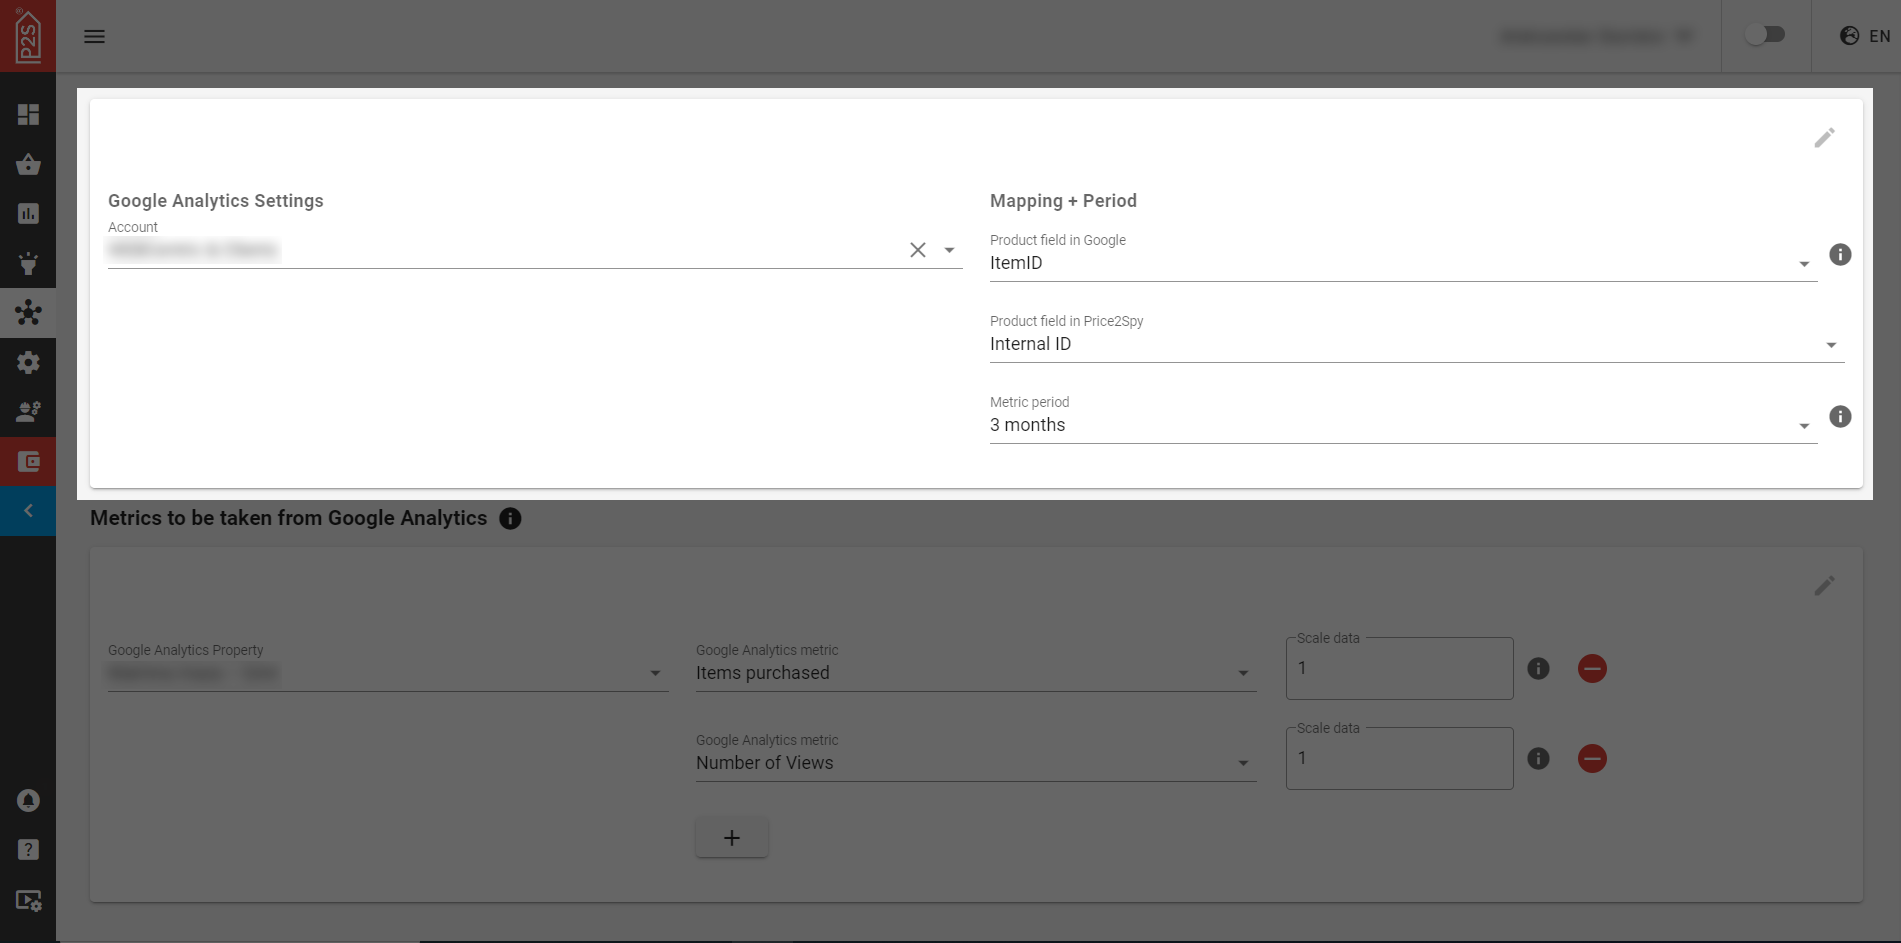
2.1. Setting up parameters
- Only one account can be connected, while multiple properties can be connected
- Account needs to be selected from a dropdown menu
- After an account is chosen, a new section appears - Mapping + Period
- Connect product identifiers in GA4 [dropdown label: Product Identifier] with equivalent identifiers in P2S
- Define metric period - Yesterday, last 2 days, [...], last month, [...], last 12 months
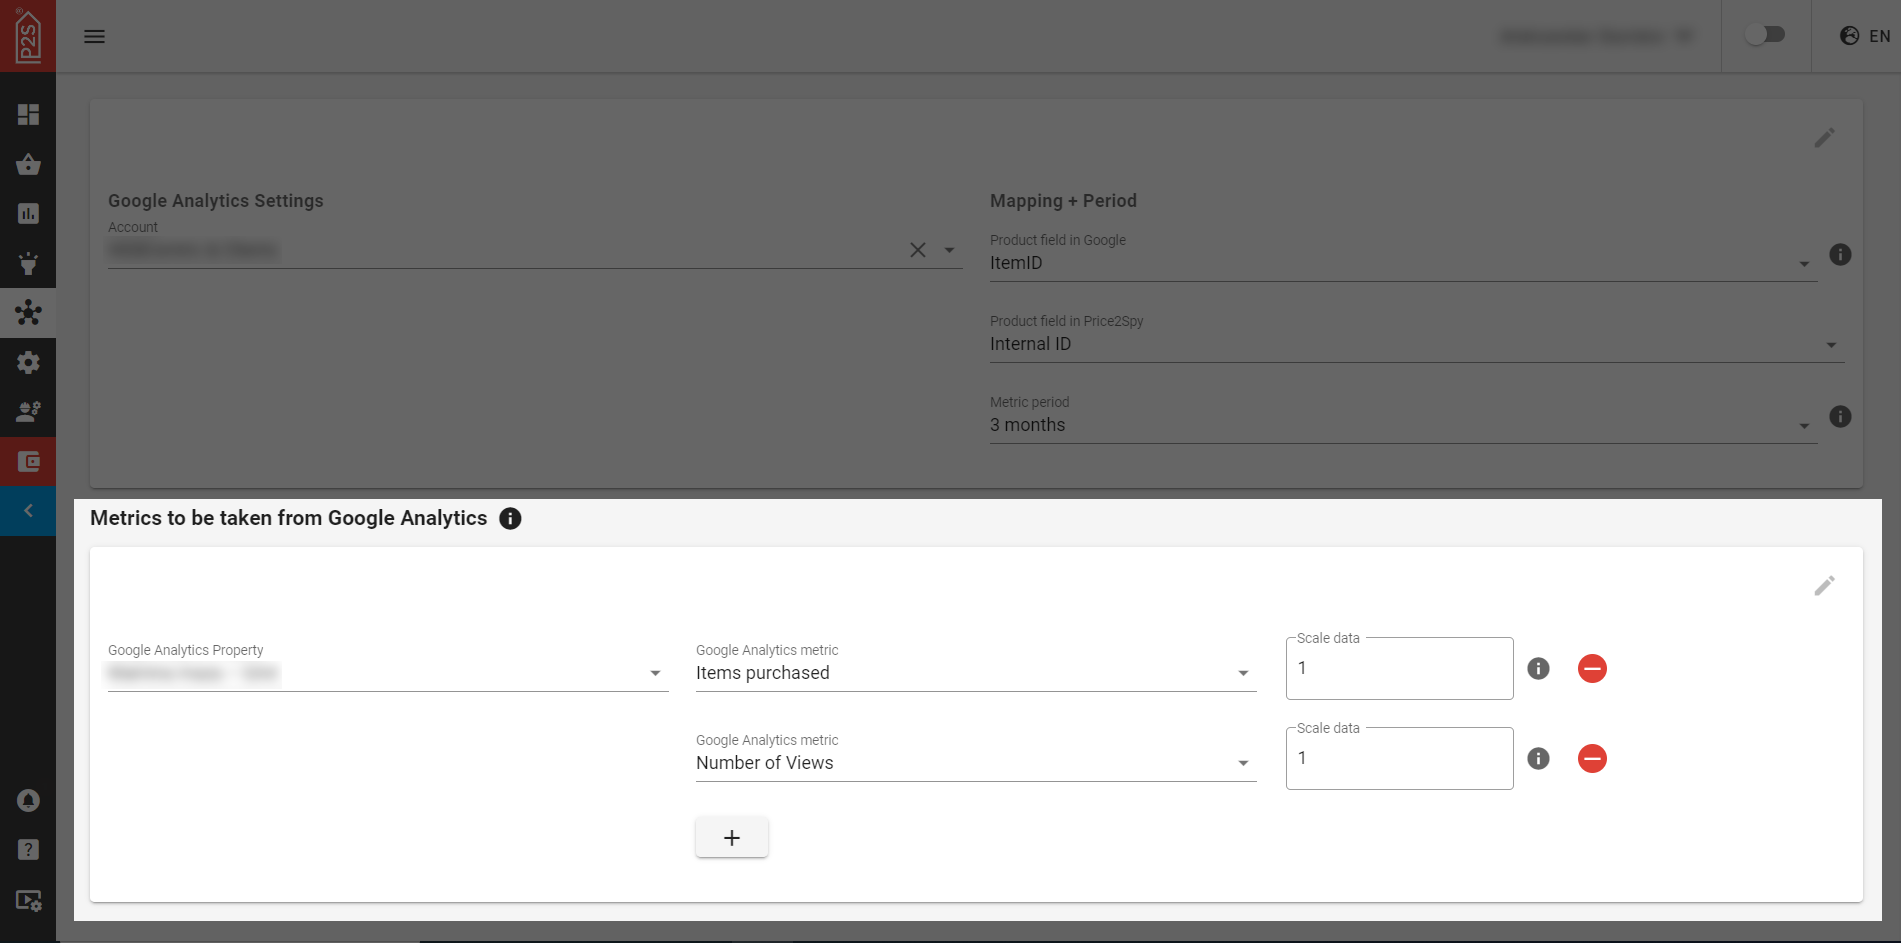
2.2. Setting up metrics (to be taken from GA4)
- A property needs to be selected before choosing any dimensions
- Two properties are immediately selected available - Items purchased + Number of views
- Four more are available - Number of list clicks, List clickthrough rate, Number of list views, Revenue
- Clients can remove or add dimensions and their respective metrics, however when removing dimensions at least one dimension needs to remain and deleting it won’t be possible
- Data scaling field - a corrective mechanism that enables users to multiply the data from the respective dimensions if they think not all data is captured by GA
Click on the TEST button.
3. Test outcome
3.1. Successful connection
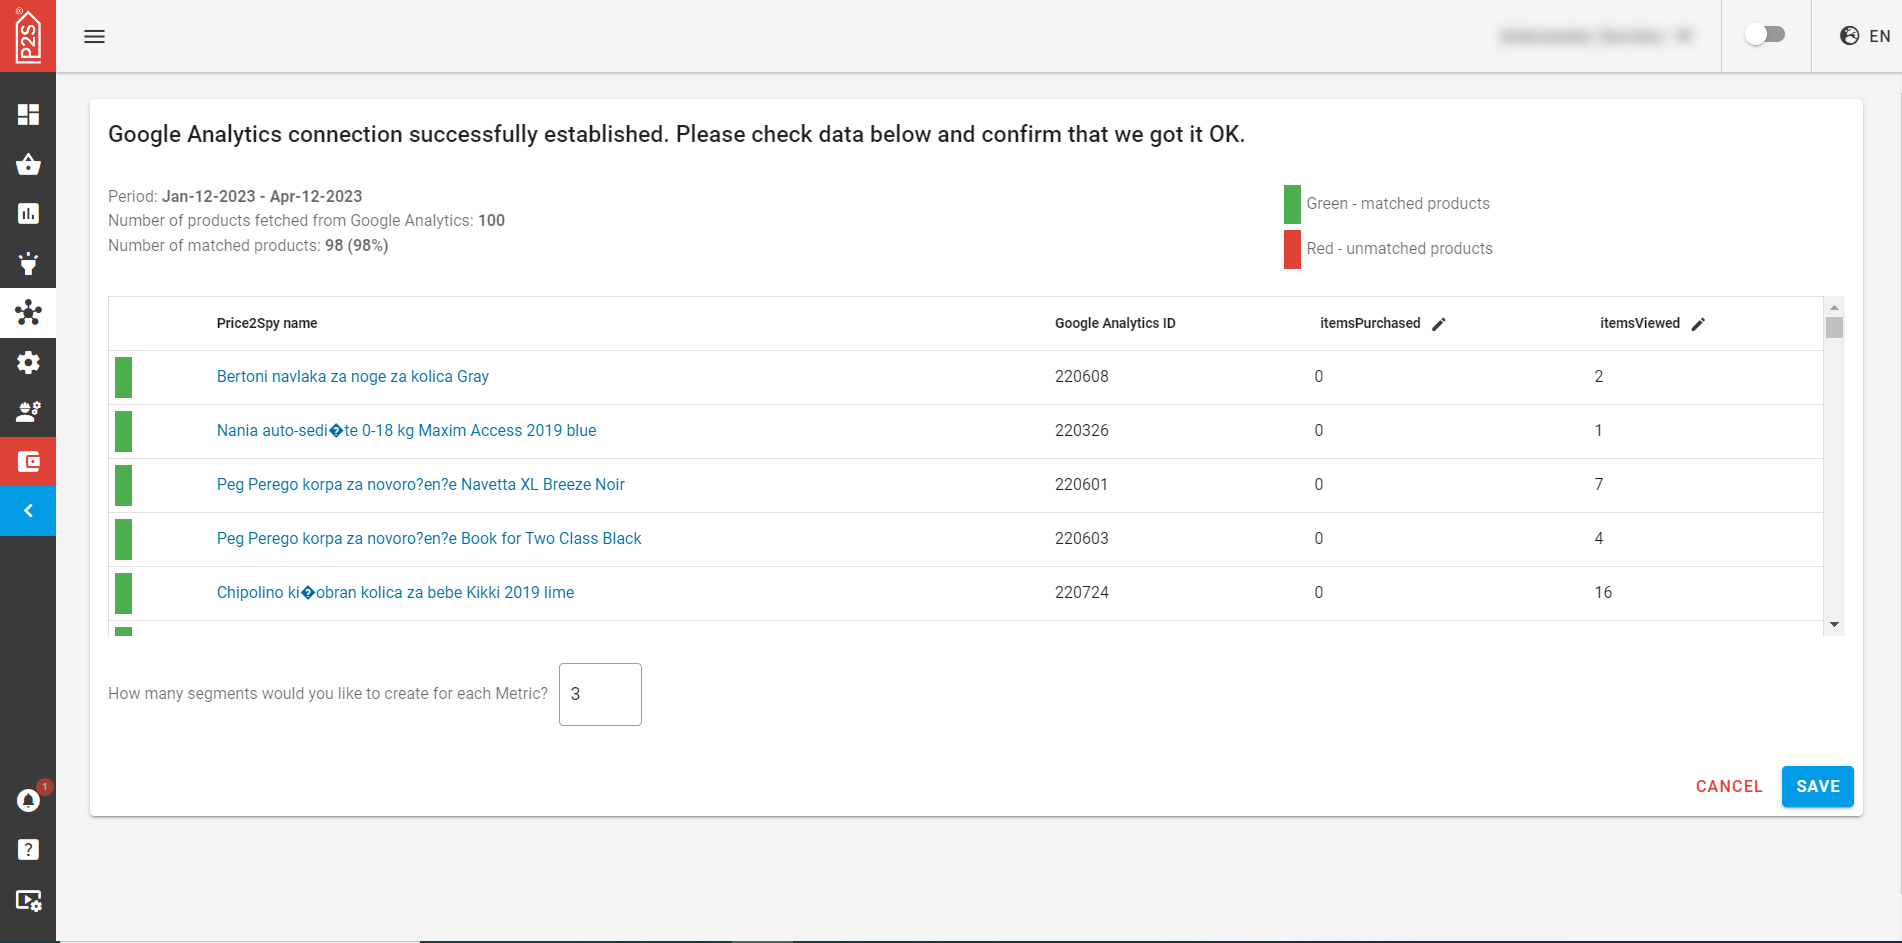
A successful test displays a success message and a table with data that was gathered/matched.
- In the table names of metrics will be editable and the user decides under what name they’ll be saved in P2S
- A prompt will be displayed below the table “How many segmentts would you like to create for each metric?” (Min:2 / Max: 20)
At this point you can choose to either cancel the connection process or confirm the results and establish the connection.
- Canceling returns the user to the previous screen
- Confirming shows a thank you message, saves account settings, saves metadata records
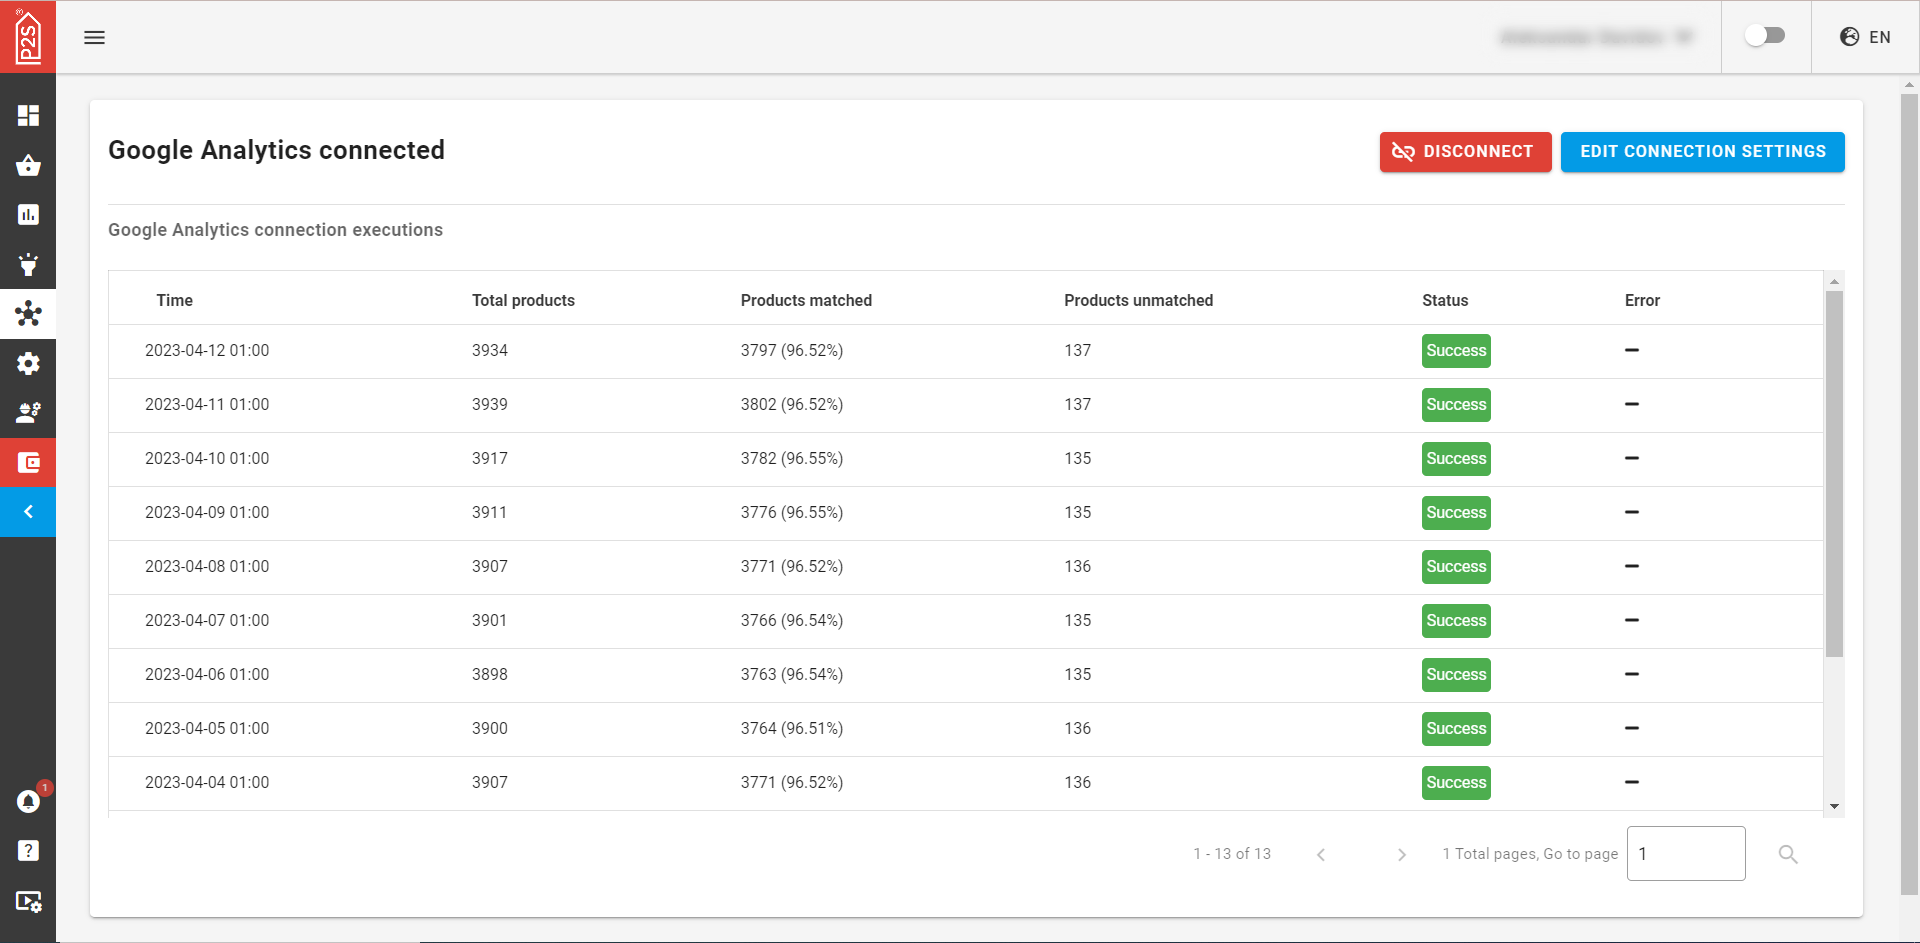
4. Connection established
After clicking confirm on the previous screen, you’ll be directed to a page with the settings you’ve chosen.
From here you will be able to change the previously set settings.
Do note, however, that if you wish to connect a different Google Analytics 4 account to Price2Spy, you will lose all the imported data from Price2Spy and you’ll have to repeat the process from the beginning.
