New customizing options available in Price2Spy
Since we have always cared a great deal about our clients’ business needs, we have decided to implement new features in Price2Spy which will really come in handy.
Therefore, upon our clients’ request, all the users will be able to customize which columns will be shown according to their own preferences on:
- Extended URL view on the Dashboard
- My products page
- Opportunities
All the changes you make will also affect your Excel export files.
If you are using User management, the customization of the columns are available for the account owner, administrator and reader. However, please, keep in mind that, in case you want to automate the report, only the columns stated by the account owner will be applied in the automated reports.
1. In case you are using our Dashboard widgets, you will be glad to hear what new features we have implemented for you!
When you want to check the URLs on the chosen widget in more details, just click on any of the products/sites to see the extended overview of URLs, each preview will contain some default columns. However, now you can choose which columns you want to see.
For example, upon clicking on “Products with no price changes” in Price change Dynamics widget, you will get the full overview of the products and the default columns:
- Last change
- Product name
- Site name
- Price start
- Price end
- Availability start
- Availability end
- My price
- My availability
- Price difference
- Targeted price
- Failures
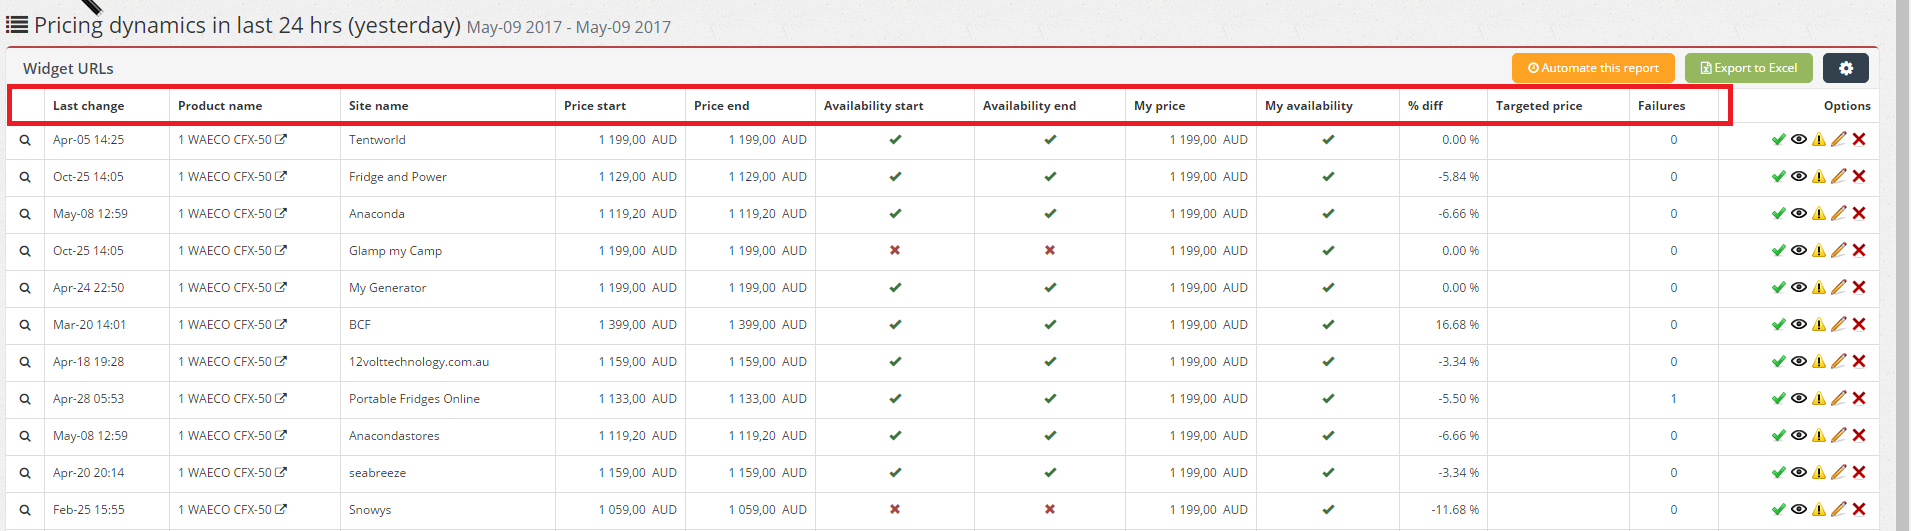
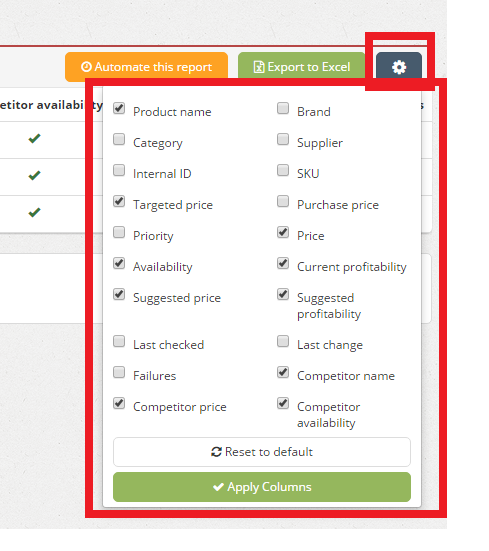
By clicking on Settings button in the right side corner (as shown on the screenshot) you will be able to customize the columns you would like to be shown on the page. From now on you will be able to add new columns:
- Brand
- Category
- Supplier
- Internal ID
- SKU
- Purchase price
- Priority
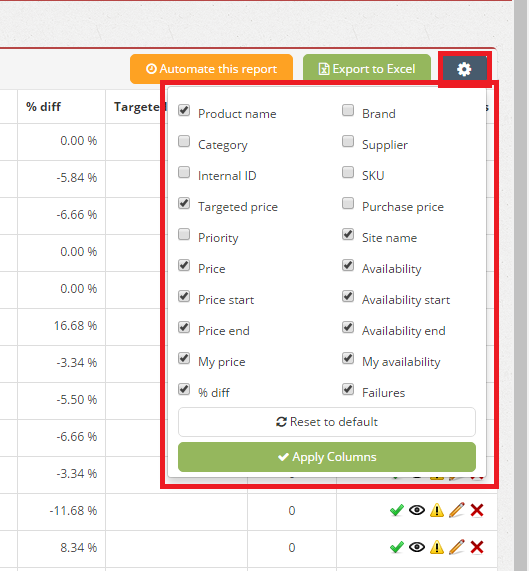
When you tick on the columns you would like to be shown, just click on Apply Columns and this way you will save all desired changes.
2. My products page
Upon entering My products page, all clients could only see the default columns but from now on they will be able to also customize their My products page in a basically same way as the columns on their widget URLs page.
Apart from the default columns, the users will be able to define which of the following columns (if not even all of them) they would like to see by using the Settings button in the right side corner as shown on the screenshot:
- Brand
- Category
- Supplier
- Internal ID
- SKU
- Targeted price
- Purchase price
- Priority
- Total URLs
- Failing URLs
After choosing what you would like to be shown on your My products page, you just need to click on Apply Columns. In case you change your mind and you want to dismiss made changes, just click on Reset to default and everything will get back to the initial view.
3. Opportunities
Upon clicking on Opportunities tab, users can choose to see one of the pricing strategies in more details:
- Clever drop
- Clever raise
- Stock / Assortment opportunity
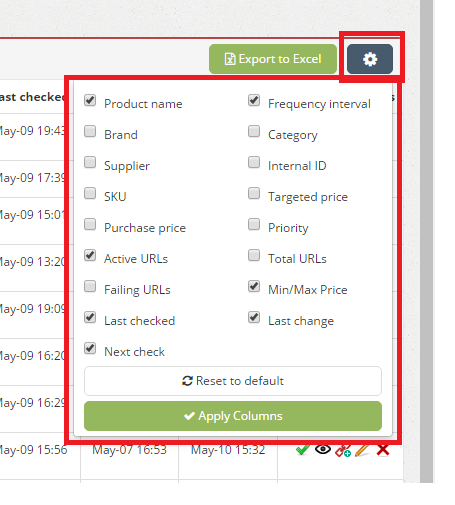
Upon choosing any of the strategies, users were able to see the overview of all Opportunity URLs and the default columns. From now on, by clicking on Settings button users will be able to choose new columns:
- Brand
- Category
- Supplier
- Internal ID
- SKU
- Purchase price
- Priority
- Last checked
- Last change
- Failures
After making all the necessary changes, just click on Apply Columns and this way you will save the changes. In case you change your mind and want to see the default changes, just click on Reset to default.
Hope this helps you out in customizing your Price2Spy account in the way you find most appropriate.